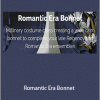
Jennifer Rosbrugh – Romantic Era Bonnet
$20.00$49.00 (-59%)
Although making a buckram bonnet can seem quite complicated, we’ll walk through each step in detail so you know exactly what to do.
Jennifer Rosbrugh – Romantic Era Bonnet
Check it out: Jennifer Rosbrugh – Romantic Era Bonnet
Millinery costume class creating a wide brim bonnet to complete your late Regency and Romantic Era ensembles
You’ve worked hard on the dress, you’ve got the petticoats made, you might even have the undergarments in order. But then, your mind catches the thought that you need a bonnet! Oh, dear. What to do?
Many times the last part of a costume ensemble that comes together is headwear.
No worries! I created this class for YOU. Those who put off the bonnet until the very end. Mainly because you’re not exactly sure how to make one or even if you can! But I’m here to tell you that making a bonnet IS within your reach!
Through four detailed lessons, I’ll cover the steps to create a buckram frame bonnet with formed crown and wide brim (also known as a poke bonnet). Each lesson has full video tutorials along with accompanying PDF handouts complete with homework assignments to keep you on track with your project.
This class is for intermediate-level crafters.
- You’ll learn exactly how to complete each step but you should understand basic sewing techniques including hand sewing stitches like the whip and stab stitch. This is more of a crafting class rather than sewing and for the most part we’ll stick with simple instructions for easy project completion.
- Understanding how a buckram frame with a large brim goes together.
- Those who want to know the basics of millinery so you can improve your skills and tackle other hat and bonnet designs. (They are limitless. 🙂 )
- Costumers who want to connect with others who are as crazy in their creativity as you are!
Detailed Tutorials:
- Lesson 1: Discuss millinery supplies & tools, recommended fabrics, cutting tips and sewing wire to buckram by hand & machine
- Lesson 2: Creating the bonnet frame; adding a mull layer then covering with fabric
- Lesson 3: Embellishing with bias edging and trims; adding the curtain and ties; finishing with the inside lining
Although making a buckram bonnet can seem quite complicated, we’ll walk through each step in detail so you know exactly what to do.
You have the opportunity to choose which time period of bonnet shape you want to make in class: the Romantic Era of the 1820s & 1830s (with a little into the 1840s) OR Regency Era of the 18-Teens. Some bonnet shapes work for many, many historical years! The techniques you learn in class will carry you far beyond this early part of the 19th Century too.
Millinery Skills & Techniques You’ll Learn:
- Fabrics specifically recommended for early 19th C. millinery projects
- How to sew wire to buckram by both hand and machine – two full tutorials!
- Why you should add a mull layer to your bonnet frame
- Cutting buckram the easy way (without having to pin your pattern to it)
- Learning how & why to use a thimble (you won’t forget to use it!)
- Tips for getting the bonnet tip to fit into the formed crown section
- How to cover a bonnet frame with fabric
- Working with a curved needle (essential for sewing brim to crown)
- Types of trims & their placement suitable for large bonnet styles
- How to apply trims to bonnets
- Adding a necessary lining to protect your hairstyle (so important!)
Intermediate Level Class (but beginners can join too). If you have sewing experience but are new to millinery, you will feel quite comfortable here. The class is designed for those who know very little about bonnet making. We’ll be following general pattern instructions but also other techniques learned over the instructor’s personal millinery creating experiences. You should be able to keep up with the class just fine.
If you are new to sewing or crafting, you are most welcome. However, you may need to rely on the glue rather than the hand stitching more often throughout the steps. Challenge yourself to something new!
If you are advanced in your sewing skills and have made/attempted bonnets or hats before, you are most welcome! Many of our students are advanced but take the classes simply as a means of personal accountability. And a way to get those pushed aside projects DONE. 🙂
Course Curriculum
- Class FAQs
- Supplies You’ll Need for Class
-
Preview
Approximate Costs for Bonnet Making Supplies
- Recommended Sewing Patterns for Class
- Researching Romantic Era Bonnets
- Homework
- What We’ll Cover in Lesson 1
- Lesson 1 Handout
- Bonnets of the Romantic Era
- Millinery Fabrics & Supplies
- Bonnet Cutting & Marking Tips
- Millinery Wire Basics
- Sewing Millinery Wire by Hand
- Sewing Millinery Wire by Machine
- Inspiration Links & Completing Lesson 1
- What We’ll Cover in Lesson 2
- Lesson 2 Handout
- Sewing the Crown Seam
- Sewing the Tip to the Crown
- Sewing Brim to the Crown
- Applying the Mull Layer & Smoothing Edges with Bias
- Covering the Brim Top with Fabric
- Covering the Brim Underside with Fabric
- Covering the Tip with Fabric
- Covering the Crown with Fabric
- Completing Lesson 2
- What We’ll Cover in Lesson 3
- Lesson 3 Handout
- Applying Fabric Bias Around the Brim Edge
- Adding the Curtain (or Bavolet)
- Adding Ribbon Ties
- Trimming Your Bonnet
- Finish with a Lining
- All Finished!
- Fashion Show
Your Instructor
Teacher to hundreds of sewing and costuming students since 2004, Jennifer dreams of the nostalgia of the past and brings it into her modern life through creating costume ensembles from about 1780 to 1920. Dark chocolate, Jane Austen and bustle dress fanatic. Daughter of the King.